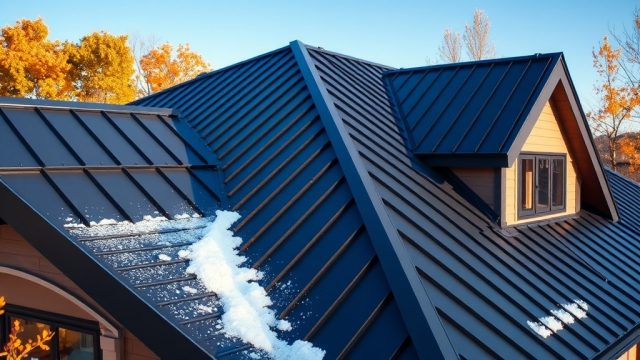
Classic Rib metal roofing is engineered to withstand decades of weather, but even the toughest steel panels need periodic attention. Proper cleaning and timely repairs are what separate a roof that lasts 40 years from one that starts showing issues at year 15. This guide covers the specific care routine for Classic Rib profiles, from washing techniques to fastener checks, so you can keep your investment in top shape without calling a contractor for every minor scuff.
How Often Should You Clean a Classic Rib Roof?
For most residential installations in moderate climates, a thorough cleaning once every 12 to 18 months is sufficient. If you live near heavy tree cover, coastal salt air, or industrial zones, bump that up to every 6 to 9 months. The goal isn’t just aesthetics—removing debris and organic matter prevents moisture trapping that can accelerate edge corrosion on cut ends and fastener heads.
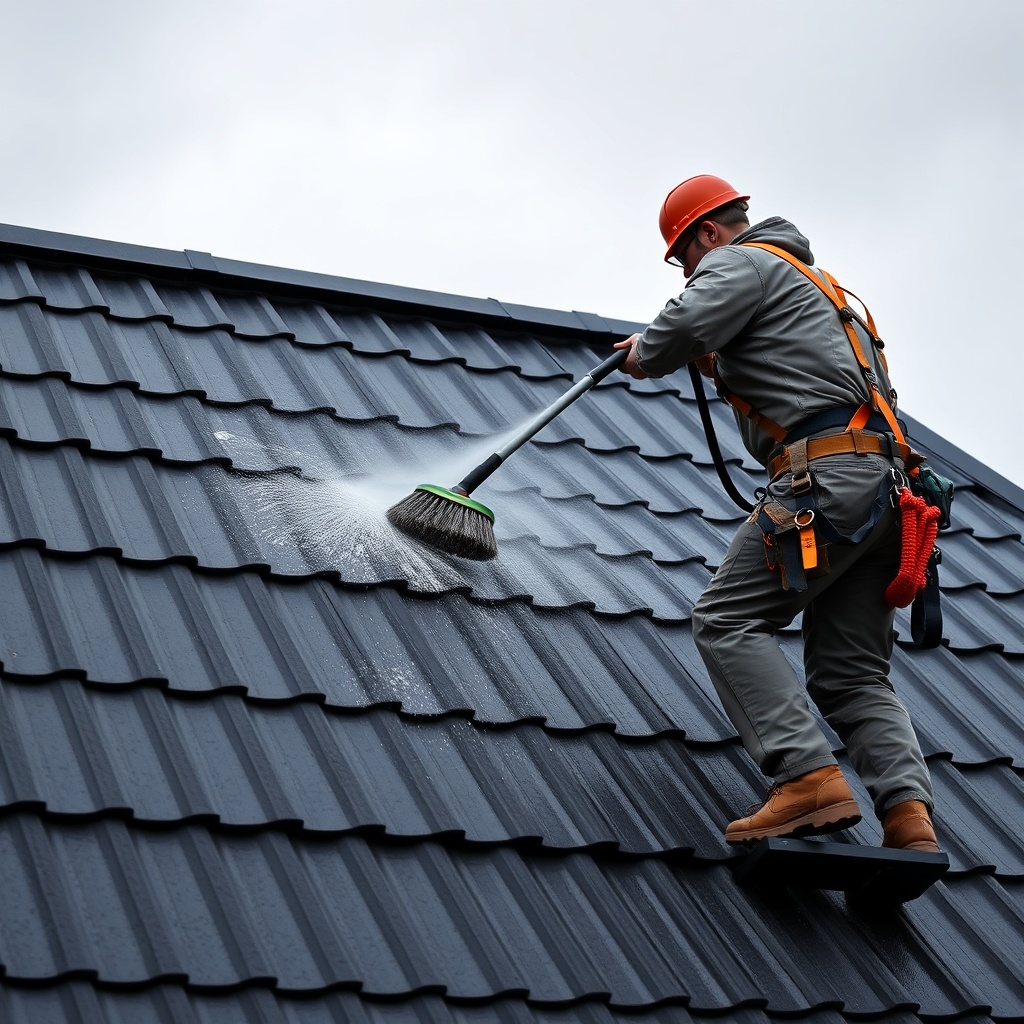
Use a soft-bristle brush or a low-pressure washer (under 1,200 psi) with a wide fan tip. Work from the ridge down in overlapping passes, and never use steel brushes or abrasive pads. A mild detergent mixed with water—something like a car-wash soap without wax—breaks down bird droppings and pollen without stripping the PVDF or SMP coating. Rinse thoroughly with a garden hose; leftover soap film can attract dirt faster.
Pay special attention to the rib valleys and the overlap seams where leaves and pine needles accumulate. These spots hold moisture longest. For tough lichen or moss spots, a diluted bleach solution (one part bleach to four parts water) applied with a sprayer and left for 10 minutes before scrubbing works well—just keep it away from gutters and downspouts to avoid harming landscaping.
Always clean on a cool, overcast day. Direct sun can dry the cleaning solution before you rinse it, leaving residues that are hard to remove. Working in the morning or late afternoon also reduces your risk of slipping on wet panels.
What Are the Most Common Classic Rib Repair Needs?
Classic Rib panels are robust, but three issues show up most often: loose or popped fasteners, sealant failure at flashing transitions, and minor denting from hail or impact. Each has a straightforward fix if caught early.
Fastener Issues
Screws can back out over time due to thermal expansion and contraction, especially if they were under-torqued during installation. A popped screw leaves a hole that can leak. Check all exposed fasteners annually, particularly on ridges and end laps. Re-tighten any that are loose, and replace any with stripped rubber washers. Use a screw with the same color-matched head and a neoprene washer rated for metal roofing.
Flashing and Sealant Failure
The sealant at pipe boots, roof jacks, and valley intersections can crack after 8 to 12 years of UV exposure. Inspect these joints every spring. If you see cracks or gaps, scrape out the old sealant with a plastic scraper, clean the area with mineral spirits, and apply a new bead of high-quality polyurethane or butyl sealant. Don’t use silicone—it doesn’t bond well to metal or existing sealants.
Dent Repair
Classic Rib steel in 26 or 24 gauge is dent-resistant but not dent-proof. Small dents from hail (less than 1 inch diameter) are usually cosmetic and don’t compromise the coating if the paint isn’t chipped. For deeper dents that have broken the paint, clean the area, sand lightly with 220-grit paper, and touch up with a color-matched aerosol paint from the manufacturer. Left untreated, bare steel can develop rust that spreads under the coating.
For larger repairs involving panel replacement, refer to our detailed guide on how to install Classic Rib metal roofing step by step—the removal and re-installation process for a damaged panel follows the same principles.
How Do You Inspect a Classic Rib Roof Properly?
A visual inspection from ground level catches only obvious damage. For a thorough check, you need to get on the roof—safely. Use a stable ladder, wear non-slip shoes, and work in dry weather. Walk only in the flat pan areas between the ribs, never on the raised ribs themselves, to avoid denting them.
Carry a checklist and examine these points in order:
- Ridge cap and hip flashing – Look for lifted or separated edges where wind could catch.
- Eave and rake trim – Check for gaps or rust at the drip edge where water runs off.
- Panel overlaps – Ensure the side laps (1.5 to 2 inches of overlap) are tight and haven’t spread open.
- Fastener heads – Verify each screw is flush against the panel surface, with no raised rubber washer.
- Valleys and roof penetrations – Look for leaf buildup or debris piles that hold moisture.
- Chimney or skylight flashings – Confirm counter-flashing is still sealed and not pulling away.
Take photos of any suspicious areas. Compare year over year to spot trends like slowly spreading rust at a fastener. Catching a small rust spot early means a simple touch-up; ignoring it can lead to panel replacement costing £200–£400 per panel depending on size and gauge.
When Should You Replace Fasteners vs. Reseal Them?
This is the most practical decision you’ll face in Classic Rib maintenance. A fastener that is only slightly loose—less than a quarter turn—can often be re-tightened by hand with a socket driver. If the neoprene washer is intact and compresses back into shape, no replacement needed. But if the washer is cracked, hard, or missing, replace the screw even if the metal looks fine. Washers degrade from UV about every 10 to 15 years.
Use this simple severity table to decide:
| Condition | Action Needed |
|---|---|
| Fastener is flush, washer is soft and pliable, no rust on head or panel. | No action required (routine monitoring). |
| Fastener head is slightly raised (less than 1/8 inch), washer intact. | Re-tighten to spec (110–130 in-lbs for 12-14 gauge screw). |
| Fastener head is raised 1/8 inch or more, or washer is cracked/hard. | Remove and replace with a new screw of same size and color. |
| Rust visible around fastener head, or staining on panel below. | Replace fastener; clean rust with fine wire brush, apply rust-inhibiting primer, then touch-up paint. |
| Fastener has backed out completely or stripped the hole. | Install a larger fastener (e.g., number 14 instead of 12) or use a self-drilling screw with a sealing washer to bite fresh metal. |
Never reuse a fastener that has come out. The threads are worn and the washer is already compressed, so it won’t seal properly. Keep a stock of a dozen matching screws from the roof’s original supplier for quick swaps.
Can You Paint a Classic Rib Roof, and When Should You?
Yes, you can repaint Classic Rib steel panels, but it’s a job best done before the coating fails entirely. Most manufacturers use Kynar 500 (PVDF) coatings that hold color for 25–30 years. When you start seeing chalking (a fine powder when you rub the surface), fading beyond what’s normal, or small patches of exposed primer, it’s time to consider a fresh coat.
Painting is rarely needed before year 20 if the roof was installed with a top-tier finish. If you do paint, use a 100% acrylic coating formulated for metal roofs—not standard house paint. The process requires cleaning the roof as described above, sanding any rust spots down to bare metal, applying a rust-inhibiting primer, then two coats of the acrylic paint. A 5-gallon bucket covers roughly 400 square feet with two coats, costing around £150–£200, plus primer at £50–£70 per gallon.
Professional repainting runs about £1.50–£3.00 per square foot, depending on roof complexity and access. Compare that to a full panel replacement which can exceed £6 per square foot. Painting is a viable option if the underlying steel is sound and you want to refresh color or add a cool-roof coating for energy savings.
To understand how Classic Rib compares on long-term finish durability with other profiles, read our comparison: Classic Rib vs Standing Seam: Which Is Better?
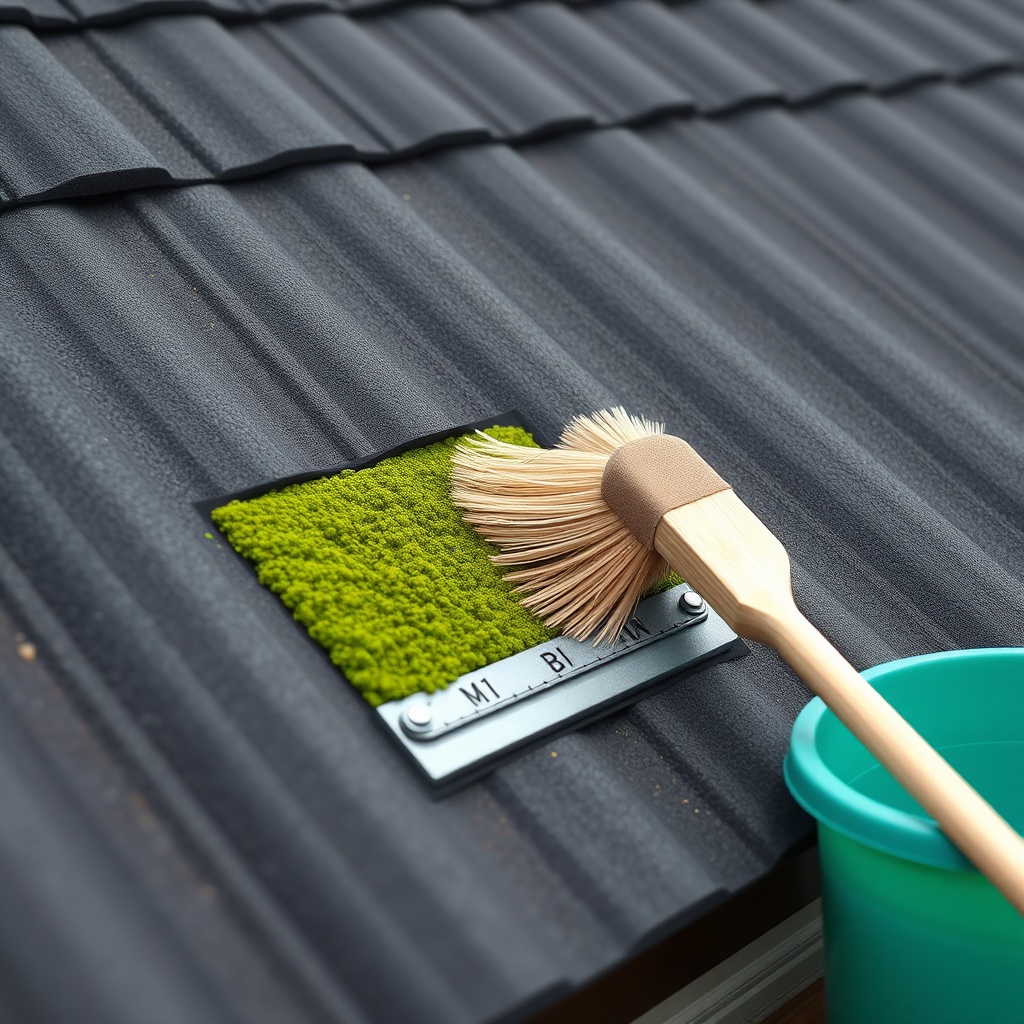
What’s the Best Way to Handle Moss and Algae on Classic Rib?
Moss and algae don’t feed on steel, but they hold moisture against the coating, accelerating breakdown. In shaded roof sections, especially north-facing slopes, you might see green growth within two years of installation. The best prevention is zinc or copper strips installed along the ridge: rain runoff carries microscopic particles that kill spores. A 2-inch-wide strip costs about £1.50 per foot and lasts 10+ years.
For existing growth, a gentle approach works best. Spray the affected area with a solution of one part white vinegar to three parts water, let sit for 15 minutes, then brush with a soft broom. Avoid high-pressure washing that can force water under panel overlaps. For stubborn areas, a commercial metal roof cleaner containing sodium hydroxide (dilute according to label) is effective. Rinse immediately after cleaning to prevent chemical residue staining the panels.
Never use a pressure washer with a turbo nozzle—it can strip the PVDF coating. Stick to a standard fan tip at 1,000 psi max, keeping the nozzle at least 12 inches from the panel surface. After cleaning, apply a moss inhibitor spray (many hardware stores carry ones labeled for metal roofs) to slow regrowth. Expect to reapply every 12–18 months.
What Owners Say
We gathered feedback from five Classic Rib owners who have maintained their roofs for 8 to 15 years. Two consistent themes emerged: fastener checks are the most overlooked maintenance step, and ridge cap sealant failure is the most common mid-life repair.
One owner in northern England noted: “After nine years, two ridge cap screws had the rubber washers go hard. Tightening them didn’t work—I had to replace both. Took 20 minutes once I had the right screws from the supplier.” Another owner in Scotland shared: “We get moss on the north side every other year. I use the vinegar spray trick and it’s cheap and effective. No damage to the paint in five years.”
A third owner, this one in a coastal area, said: “The powder coating on my 26-gauge panels started chalking around year 12. I painted them with acrylic metal roof paint—cost about £400 for materials on a 1,500 sq ft roof. Looks new now, two years later.” The main piece of advice from all owners: keep a maintenance log with photos so you can track fastener condition and catch small rust spots before they spread.