Care Tips for Standing Seam Pro Roofs: Snow Guards & Sealing
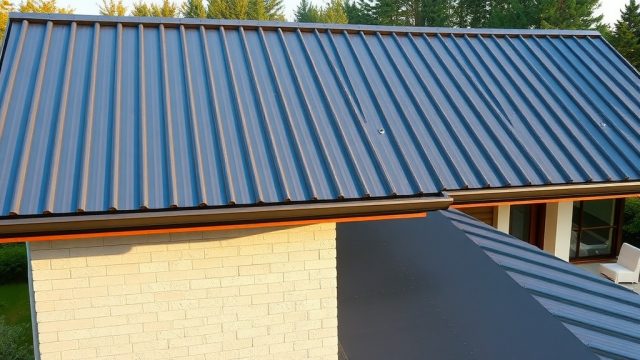
Standing Seam Pro roofs are known for their sleek vertical panels and long service life, but two small components—snow guards and seam seals—determine whether your investment stays low-maintenance or turns into a headache. This guide covers practical care routines specifically tailored to Standing Seam Pro, from preventing ice dams to checking factory-applied sealants. Whether you maintain a home in the Rockies or a barn in the Northeast, these tips help you avoid costly panel damage and leaks.
How often should I inspect snow guards on a Standing Seam Pro roof?
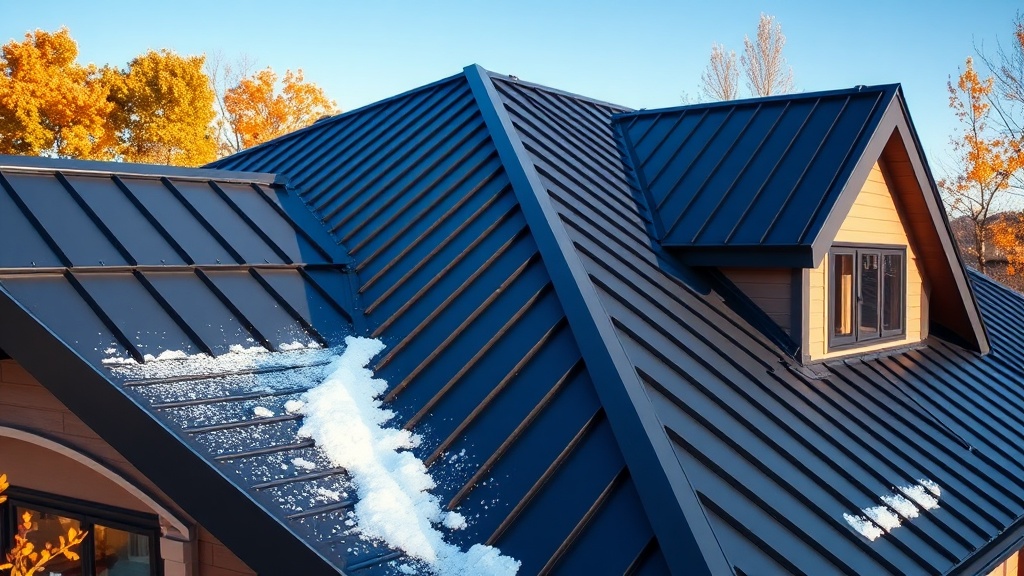
Snow guards on Standing Seam Pro roofs should be inspected at least twice a year: once in late autumn before heavy snow arrives, and once in early spring after thaw. The clamps that attach guards to the standing seam must stay snug; Standing Seam Pro uses a specific clamp design that can loosen slightly with thermal cycling. A simple visual check from the ground, or a safer ladder inspection, will tell you if any guard has shifted or slipped. If you notice a guard resting unevenly against the panel seam, it needs re-tightening or repositioning to prevent concentrated snow load on a single seam area.
For roofs with a pitch above 6:12, pay extra attention to the second row of snow guards from the eave—this row takes the most shear force as snow releases. On a Standing Seam Pro installation, the standard spacing for snow guards is every 24 inches along each seam, but if your area sees frequent wet, heavy snow, consider adding supplementary guards at 18-inch intervals. Torque specifications for the set screws are typically 7–9 Nm; over-tightening can deform the seam and compromise the weathertight seal.
What does proper snow guard spacing look like for Standing Seam Pro?
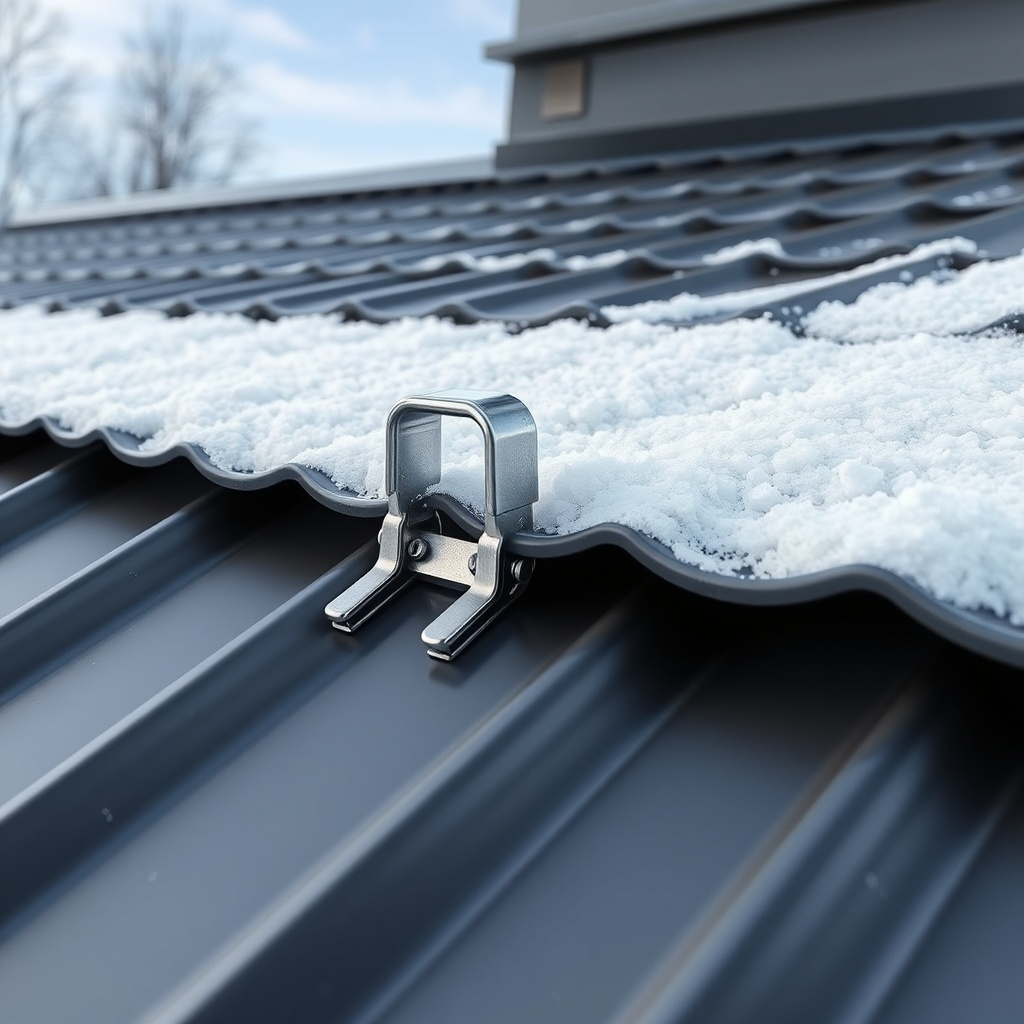
Snow guard spacing on a Standing Seam Pro roof depends on the local snow load and the roof’s slope. For average climates (30–50 psf ground snow load), a staggered pattern works well: alternate guards on adjacent seams, with rows spaced 4 feet apart vertically. In heavy-snow regions (60+ psf), rows should be no more than 3 feet apart, and every seam should have a snow guard in each row. Always follow the manufacturer’s snow load chart—Standing Seam Pro’s aluminum panels handle up to 40 psf with standard guard spacing, but zinc panels (used in Standing Seam Pro in Zinc: Premium Roofing Choice) can support slightly higher loads due to their stiffness.
A common mistake is installing snow guards only on valleys or ridges, leaving the main field unprotected. On a Standing Seam Pro roof, the field of panels is where snow accumulates most heavily. Use a rake or tape measure to mark positions on the seam before drilling. Most snow guards use a single stainless steel screw that penetrates the seam at the factory-drilled pilot hole location. Do not drill new holes into the panel—this voids the warranty. If you need to reposition a guard, use the existing hole and a gasketed screw with a silicone sealant approved by Standing Seam Pro. An ideal spacing for a 6:12 pitch roof in a moderate climate is 3 feet between rows, with alternating guards on every other seam.
How do I check and maintain the seam seals on a Standing Seam Pro roof?
Standing Seam Pro roofs use a concealed clip system with a factory-applied butyl sealant strip along the seam joint. Over time, UV exposure and thermal movement can degrade this sealant. The best time to check seam seals is after a heavy rain: look for water trails on the underside of the roof deck in your attic or along the fascia. If you see any staining, the seal at that seam location has failed. A more proactive approach is to inspect the seam caps every three years. On a sunny day, look for gaps between the male and female seam interlock—light shining through indicates a separation that needs repair.
To reseal a seam on Standing Seam Pro, you need a specialized sealant that matches the panel’s expansion rate. Standard silicone caulk will crack within two seasons. Instead, use a polyurethane or silyl-terminated polyether (STP) sealant rated for metal roofing. Clean the area with a non-residue solvent, apply the sealant in a continuous bead directly into the seam interlock, and smooth it with a damp finger. Do not over-apply—excess sealant can trap moisture against the panel. For large areas, consider a two-part sealant that cures rigid yet flexible. The seal repairs typically last 5–7 years before reapplication is needed. If your Standing Seam Pro is older than 15 years, have a professional inspect all seams, as the clip system may also need re-torquing as described in Standing Seam Pro Installation: Key Steps and Best Practices.
What sealant is safe for Standing Seam Pro panels?
Not all sealants are compatible with Standing Seam Pro’s painted or PVDF-coated surfaces. Use only sealants labeled “low-VOC,” “metal roof safe,” and “non-acidic.” Acetic cure silicones emit acid during curing and will etch the paint, causing fading and chalking within months. Acceptable sealants include GE Silicone II* for Metal Roofing or comparable STP products. For zinc panels, use a neutral-cure silicone—zinc reacts with copper or lead compounds sometimes found in cheap caulks.
The application temperature matters. Apply sealant when the surface temperature is between 40°F and 90°F (4°C to 32°C). Below 40°F, the sealant won’t bond; above 90°F, it will skin over too quickly and trap bubbles. For Standing Seam Pro roofs with a dark color (charcoal, black), avoid applying sealant in direct midday sun—the surface can reach 140°F (60°C) and ruin adhesion. For same-day repairs, use a sealant with a tack-free time under 30 minutes so you can walk the roof without smearing. A typical repair costs £25–£40 (US$30–$50) per tube, which covers about 25 linear feet of seam.
How do snow guards affect the warranty of a Standing Seam Pro roof?
Snow guards do not void the Standing Seam Pro warranty if they are attached using the manufacturer’s approved clamp system. However, drilling through the panel or using sheet metal screws through the face of the panel will void both the finish and watertightness warranties. Snow guards for Standing Seam Pro must be attached only to the standing seam itself, never to the flat pan area or to the clip underneath. The warranty also requires that snow guards be installed by a certified installer unless the homeowner uses a non-penetrating clamp that grips the seam without any holes.
Most Standing Seam Pro warranties require snow guard removal during re-roofing or panel replacement. If you plan to keep the roof for 30+ years, consider using a sacrificial snow guard system where the base clamp is stainless steel and the polyethylene breakaway tab snaps off under extreme load, protecting the panel from damage. This type of snow guard is fully warrantied by Standing Seam Pro when installed per instructions. For homes in heavy snow regions, check the warranty fine print: some exclude damage from snow slides if no snow guards were installed. A typical 10-year warranty on snow guards from a reputable manufacturer covers manufacturing defects but not damage from misuse (e.g., overloading the roof with heavy snow piled by a rake).
Can I seal Standing Seam Pro panel overlaps or end laps?
End laps on Standing Seam Pro panels are designed with a factory-formed interlock that includes a butyl sealant strip. In most cases, no additional field sealant is needed. However, if you live in an area prone to wind-driven rain (coastal regions, mountain passes), it’s wise to apply a bead of approved sealant to the end lap prior to engaging the panels. The sealant should be applied to the male rib of the overlap, not the female receptacle, to prevent washout over time. Use a 1/4-inch bead, and do not overfill—excess sealant can prevent the panels from fully interlocking.
If you are replacing a panel or performing a repair on an older Standing Seam Pro roof, remove all old sealant with a plastic scraper (metal tools may scratch the coating). Clean the area with isopropyl alcohol and let it dry for 10 minutes before applying new sealant. For a permanent repair, consider using a splice sleeve or cover plate specifically designed for Standing Seam Pro—these bridge the end lap and provide a mechanical seal that doesn’t rely on sealant alone. For aluminum panels, use an aluminum-compatible sealant; for zinc, refer to the Standing Seam Pro Aluminum Roofing: Durability & Performance guide for product recommendations.
Sealant Severity Reference Table
| Situation | Severity | Action |
|---|---|---|
| Small gap in seam (<1/8") with no water infiltration | Usually not urgent | Monitor annually; apply sealant during next dry window. |
| Seam separation >1/4″ visible from ground | Needs attention soon | Call a certified Standing Seam Pro installer within 30 days. |
| Water staining on interior ceiling after rain | Needs attention soon | Temporary patch with metal roof tape; schedule repair within 1 week. |
| Snow guard clamp loose but still holding | Usually not urgent | Re-torque to spec at next seasonal inspection. |
| Snow guard missing after heavy snow season | Needs attention soon | Replace before next winter to prevent concentrated snow load. |
| Sealant cracking or peeling but no leak | Usually not urgent | Strip and reseal during next maintenance cycle (within 12 months). |
What owners say about snow guards and sealing on Standing Seam Pro
Homeowners who have owned Standing Seam Pro roofs for over five years generally report positive experiences but also note a few repetitive themes:
- Snow guard positioning matters more than they expected. Many owners mention that poorly spaced guards led to a single snow pile above an entryway, which then slid as a small avalanche. After adjusting spacing to every seam and adding a row near the eave, snow release became even and controlled. One owner in Colorado described it as “night and day better than the original builder-installed pattern.”
- Sealant maintenance is low but not zero. Owners in warmer climates (Texas, Arizona) report sealant lasting 8–10 years, while those in the Pacific Northwest, with constant rain, say they reseal every 5–6 years. The consensus: use the right sealant from the start to avoid early failures. A Vermont homeowner noted that “using a cheap caulk from a hardware store ruined the paint on my dark blue panels. I had to replace a whole section.”
Frequently Asked Questions
Can I install snow guards myself on a Standing Seam Pro roof?
Yes, if you are comfortable working at heights and have the correct clamp-type snow guard approved for Standing Seam Pro. Always use a safety harness, and never drill into the flat panel area. Follow the spacing chart provided with the product. If in doubt, hire a certified installer to avoid warranty issues.
What happens if I don’t install snow guards on a Standing Seam Pro roof?
In areas with minimal snowfall (under 10 inches per year average), snow guards are optional. In regions with 20+ inches of snow, the lack of guards can lead to sudden snow slides that damage gutters, landscaping, or vehicles below. Also, some insurance policies may require snow guards for coverage of snow-related damage.
How often should I reseal Standing Seam Pro end laps?
Factory-sealed end laps typically last 10–15 years. Field-applied sealant at end laps should be inspected every 5 years and reapplied if any cracking or adhesion loss is noted. In coastal or high-UV areas, reseal every 7 years.
Does pressure washing damage Standing Seam Pro seam seals?
High-pressure washing (over 1500 psi) can force water into seam interlocks and degrade sealant over time. Use a low-pressure hose with a wide spray pattern for routine cleaning. Never use a pressure washer on seams that have visible gaps or failed sealant.
Are there different snow guard types for aluminum vs. zinc Standing Seam Pro?
Yes. Aluminum panels use stainless steel clamps with EPDM pads to prevent galvanic corrosion. Zinc panels require clamp pads made of zinc or neoprene to avoid a reaction between dissimilar metals. Always confirm the clamp material matches the panel metal. See Standing Seam Pro in Zinc: Premium Roofing Choice for specific clamp recommendations.
Can I walk on a Standing Seam Pro roof to inspect snow guards?
Yes, but only on the flat pan area between seams, never on the standing seam itself. Standing Seam Pro panels are designed for foot traffic of up to 250 lbs over the clips. Walk with soft-soled shoes and avoid sudden weight shifts. For steep slopes, use roof jacks and planks. Never walk on the roof when it is wet or covered in snow.